06 October 2015

Part 1 Surface Distortion Project 2 Tearing and cutting Exercise 2

Exercise 2 Cutting edges

Using A4 printer paper I followed the instructions for Exercise 2 and cut the paper into a series of evenly spaced strips down one side.  As suggested I made small slits along the uncut edge and pushed the strips through the slits. As I did this I decided to cut the slips at different heights along the edge.  I did this in threes so that the first strip was pushed through the lowest slit just a little so that a long loop was left.  The next strip was pushed further into the next slip higher up leaving a shorter loop and the final strip pushed through the highest slit and pulled through to make a short loop.  I continued along the piece of paper in this way.  I liked the edge that could be made with the loops and that the length of each loop could be played with to made a different edge.  I liked the flexibility of the paper when cut like this. I liked the reverse side of the edge when the paper was bent and the different length strips inside wove over each other.
I again used A4 printer paper to cut a fringe down each side of the sheet with the strips 1cm in width and 10cms long.  The uncut centre being about one and a half centimetres in width.  I decided to join the fringe edges together with thread and began by sewing through each strip about half way down the strips.  As I went along I then decided to sew through the strips near to their edge and then reverted towards the end back to the middle of each strip.  The sample could then be twisted.  I pushed down on the sewn fringe and liked the area where I had sewn halfway down the strips because of the 'V' shapes that formed along the strip edge.  I liked the combination of the harshness of that shape with the softness of the rolls that were made from the strips as then were brought together from the centre to the sewing edge. 


Using cartridge paper that I had applied tissue to and painted and sponged paint onto the reverse side I cut a fringe on one side of 2cm width strips and a fringe of 1cm strips down the other side.  I cut slits into alternating 2cm strips and threaded through alternating 1cm strips.  This I think worked well giving a slight twist to the piece.  It was sturdy and was easy to manipulate.  I like the crispness of the piece in look and handling.  I also like the effect the colour gives.  The brightness of the lightly sponged underneath to the textured deeper colour of the green top.  I think this is because it allows the twist and the method to be shown clearly.

I then decided to use a material that was softer but still paperlike.  I had some kitchen roll that I had mopped up paint with and had cleaned print linocuts with.  I liked the effect this gave and decided to cut fringes along either edge of 2cm width strips but cut on a slant.  The kitchen roll could be manipulated well but to keep the manipulated strips in place I used thread to sew along as I folded the strips over. I decided to use thread because the kitchen roll was too fragile to push strips through slits and because I wanted to incorporate stitch.  I like stitch and paper.  One side I folded over continuous strips and this made a nice soft curled over edge.  The other side I sewed alternate strips over.  I do not like this side as much as the other because i don't like the look of the unfolded strips against the folded ones.  I think this is because of the width of them making them look cumbersome.  

The decided to use a fabric but wanted to manipulate something substantial so I cut fringes along a length of vilene that I sponged with acrylic paint leaving a 1cm uncut area in the centre.  The strips were cut 4cms wide along one edge and 1cm wide along the other.  All the strips on both sides then had a slit cut into them toward their edge.  I tried to thread through the thin strips into the wider strips but this was unsuccessful.  I think this was because they were all too short being approximately 3cms in length and it just looked messy and would not stay formed.  I decided I needed something more substantial to thread through each strip.  I had dried some lavender last year from my garden and had kept the stalks as well as the seeds.  I threaded the strips with the lavender stalks threading 3 or 4 strips at a time onto one stalk.  I did three then threaded one stalk through the remaining strips along the length of the piece.  

I really like vilene and lavender stalk sample.  I am pleased with the way it is being held together but can be twisted and manipulated in different directions. The lavender sticks are firm but delicate and I like the combination of the thin sticks with softer wide strips of the vilene.  Again I like the firmness of the vilene although it is soft to handle.

Printer paper

Printer paper

Printer paper


Printer paper


Printer paper


Printer paper and thread


Printer paper and thread


Printer paper and thread


Painted cartridge paper

Painted cartridge paper


Painted cartridge paper

Painted printed kitchen roll


Painted printed kitchen roll

Painted vilene and lavender stalks

Painted vilene and lavender stalks


Painted vilene and lavender stalks
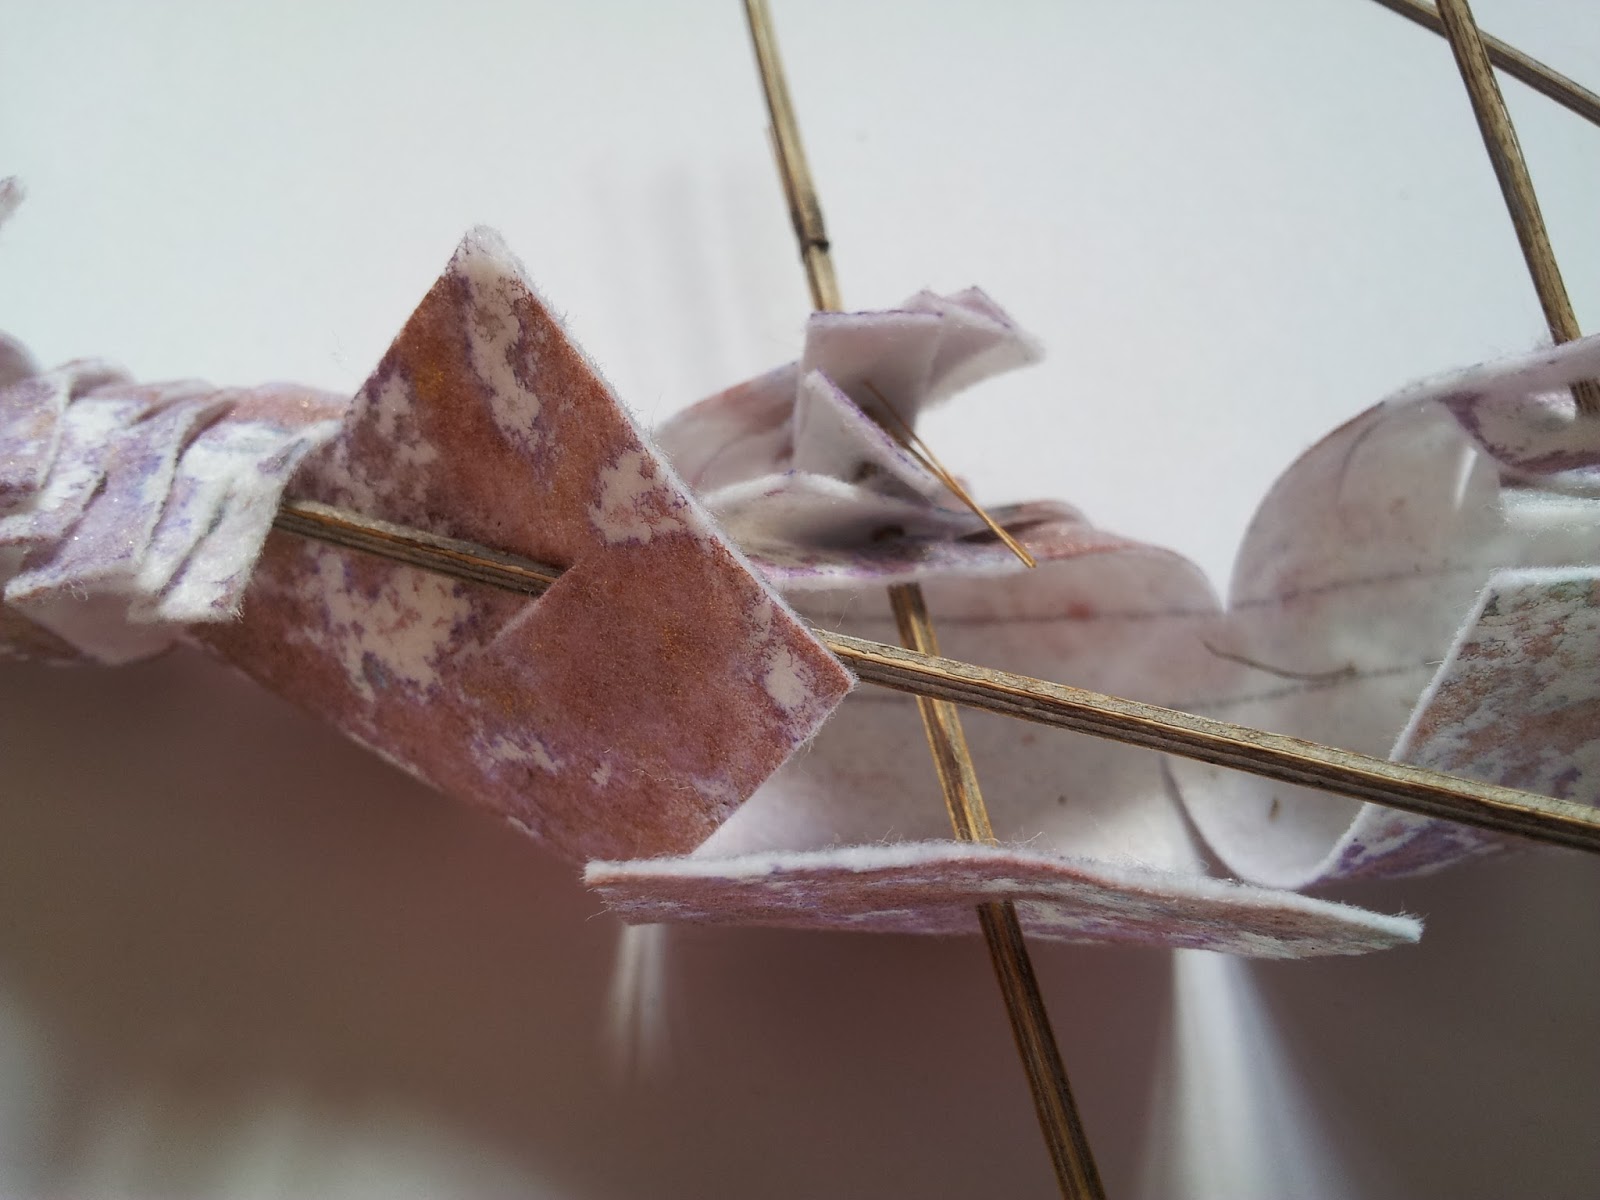

Painted vilene and lavender stalks


Painted vilene and lavender stalks


References

Vyzoviti, S. (2006). Supersurfaces. Corte Madera, Calif.: Gingko Press.

Vyzoviti, S. (2003). Folding architecture. Amsterdam: BIS.

Greenlees, K. (2005). Creating sketchbooks for embroiderers and textile artists. London: Batsford.

Holmes, C. (2015). Stitch Stories. Pavilion Books.


Embroidery Magazine Article Sept/Oct 2015 Issue

Over the years I have subscribed to a number of stitch and craft magazines.  During that time I have not renewed subscriptions and then taken on new subscriptions to other magazines.  I subscribed for many years to Embroidery then for a period decided it was not what I wanted or needed from a magazine at that time and dropped the subscription.  The point of this is that since starting to study Textiles with the OCA I have been debating which magazines to subscribe to.  I had bought single issues of the ones I liked and had a shortlist but still did not take the plunge to get a subscription.  It was therefore with interest that I read the article in the weekly WeAreOCA on Subscribing to Periodicals by Rebecca Fairley.  This led me to a decision to subscribe to Embroidery magazine.

The first issue in my subscription arrived the other day and I was reminded of what joy I feel receiving such a magazine through the post.  I thought I would just flick through and settle down to a proper read when I had the time needed to do so.  There were many articles that caught my eye but one in particular kept my attention.  This was titled 'the long goodbye' and is an article about a series of portraits called the dementia darnings by Jenni Dutton.  These were made in the beginning as a personal diary but grew into a work of 14 portraits that have been exhibited at London's City Hall.  

As I looked at the pictures I was moved to tears.  Jenni Dutton has captured all the pain and frailty that the disease causes and I cannot think that there would not be anyone moved emotionally by this series of work.  

References

Fairley, R. (2015). Subscribing to Periodicals and Magazines | WeAreOCA. [online] Weareoca.com. Available at: http://weareoca.com/textiles/subscribing-to-periodicals-and-magazines/ [Accessed 6 Oct. 2015].

the long goodbye. (2015). Embroidery, (September/October 2015), pp.20 to 27

Jennidutton.com, (2015). jenni dutton conceptual clothing artist. [online] Available at: http://www.jennidutton.com/index.html [Accessed 7 Oct. 2015].


28 September 2015

Part one Surface Distortion Project 2 Tearing and cutting Exercise 1

Exercise 1 Cutting central space

Using A4 paper I cut strips into the centre.  This could then be bent to make the negative spaces as wide as they would go by pushing the ends towards each other.  This made quite a substantial piece and when connected together at the edges reminded me of paper lanterns.

I then twisted alternate strips inwards.  These stayed in place reasonably well and I think gave a more interesting form to the sample. 

I next used corrugated card and cut strips into the centre every 2cms leaving an edge either side of 3cms.  As I expected this made quite a sturdy piece.  However it was difficult to manipulate into different shapes so I thought not successful for this reason.

I then tried using a piece of brow paper from a paper bag that I had painted on one side.I cut strips half a centimetre apart leaving 3cms at each edge.  This produced a very flimsy piece.  It was much easier to manipulate than the card and the A4 paper.  However it was much more fragile.  I think this was due to the size of the strips I had made.  I did like the the almost rough but delicate effect that I got when fastening the edges together and pushing down on the paper.  The strips formed in different directions and I liked the look because of the different shapes that formed in the negative spaces. 

I wondered what would happen if I used a fabric.  I chose to use a metallic effect mesh fabric.  This of course was very flimsy at the outset and I did not have much hope of the piece standing firm on its own.  This was right but because of the finish on the mesh it could be manipulated and squashed nicely into interesting shapes.  I decided to stitch some thread along each strip weaving it between the holes in the mesh.  I thought this may put more substance into the piece.  It did but very little.  What I did like about this piece was the lovely shadows that occurred as I was photographing it.  I decided to lay it onto my sketchbook and trace along the lines in pencil.  I had seen how to do this shadow drawing described by Donne Swift in the book Stitch Stories by Cas Holmes. I thought it worked well and I was able to see how textures could be built up in this way.

I continued by cutting into plastic.  The plastic was a plastic insert for a file.  Although it was easy to cut into it was very difficult to manipulate.  I cut a piece that had two and a half centimetre strips one centimetre from each edge.  This made a piece that could be twisted into different directions but was not was not substantial enough to keep the twisted form and kept ending up into a flat piece. I think this was unsuccessful for a few reasons - the property of the material, the width of the strips being too wide with to small an edge.  It was able to stand freely when I taped the edges together and again when photographed made a nice shadow because of the light filtering through the plastic and the small gaps.

I made a smaller piece in the same plastic that was 10cms in length.  I cut strips 1cm wide 2cms from each end.  This showed the same properties as the larger piece although because the strips were thinner I was able to twist some of them inward and these held when the piece was taped together at the edges to made a cylinder.  When I photographed this I liked the shadows that were formed where the light was filtering through it rather than the actual structure itself.  I think the reason for the plastic pieces not being as successful as previous is the nature of the material.  It was more unyielding than the paper and fabric.

I decided to go back to fabric and chose a piece of felt.  The felt was very soft and easy to cut.  I cut strips 2cms in width leaving 3cms at either end.  It was as I expected a very flimsy piece but one that could be manipulated very well.  I could twist it and particularly liked it when it was placed on a surface then pushed down from the top and the strips pushed outwards.  I think I liked it because it kept its form, looked substantial although it was very soft to handle.

I drew the samples in my sketchbook and this helped me see the negative spaces in them.  I did like the shadows that were made when I photographed them and did more shadow drawing.


 Paper

 Paper alternate strips pushed inwards


 Corrugated card


 Corrugated card


 Painted brown paper


 Mesh fabric


 Mesh fabric with thread running through


 Interesting shadows from mesh fabric


 Plastic

 Plastic


 Plastic twisted interesting shadow


Felt

 Felt


Felt


References

Holmes, C. (2015). Stitch Stories. Pavilion Books.

Vyzoviti, S. (2006). Supersurfaces. Corte Madera, Calif.: Gingko Press.

Greenlees, K. (2005). Creating sketchbooks for embroiderers and textile artists. London: Batsford.

25 September 2015

Part 1 Surface Distortion Project 1 Folding and Crumpling Exercise 5

Exercise 5 Basic crumpling technique


For this exercise I used an A3 size heavy weight tissue paper. I followed the instructions at the beginning of the exercise regarding the repeated crumping and part opening of the tissue.  I really liked the way the paper began to give and became very soft and pliable.

I created a single rib and was surprised at how the paper kept the shape.  I then made a series of ribs along the length of the paper.  This gave it an interesting texture because of the soft valleys and mountains formed by the ribs along with the creasing from the crumpling earlier.

I then made ribs from a central point.  This again gave an interesting structure and kept its shape well although made from tissue paper.  I think that the crumpling at the beginning of the exercise seemed to give structure to the paper although overall it has a very soft delicate feel.

The paper was moulded over a flower shaped paint pallet.  This made a very good surface creating lots of undulating edges and dips.

I then crumpled the paper again and folded it over at intervals over a cone that held knitting ribbon.  This gave more height to the surface but not as firm a structure and collapsed in places. 

I then rolled the paper at intervals over a roll of thread and created sausage shaped ridges over the length of the tissue.  This was a good surface texture but not as interesting as the surface created with the paint pallet.

Next a pin cushion was used to mold the tissue over at interevals.  This made a very successful series of rounded shapes but again I felt not as interesting or exciting as the one I created using the paint pallet.

During the exercise I drew the results into my sketchbook using different media.
I found it difficult at first to draw the crumpled tissue because of the many edges, lines and shadows created by the crumpling.  I remembered then that I could break the drawing down into mark making and not get bogged down with trying to replicate the paper exactly.  This made me free up in my drawing and I really liked to use the soft tipped fibre pen.  I feel this helped me to get the essence of the lines of the paper and some shadow.

I also found that using different papers for collage helped me to create the texture I wanted to show from the crumpled tissue and then the added wash of ink to add some shadowing. 

I enjoyed this exercise.  I think because I like texture and can see that this can be created by working and re-working a material t get different effects.


 Single rib


 Multiple ribs


 Ribs from central area


 Molded over paint pallet

 Molded over paint pallet


 Molded over cone


 Molded over thread


 Moulded ove


 Molded over pin cushion